Getting started with Device Fingerprinting
Stytch's Device Fingerprinting (DFP) empowers you to identify and track devices that access your application with robust identifiers that you can use for fine-grained traffic shaping. Use our DFP product to detect and stop bots, web scrapers, and malicious actors or personalize experiences for new or returning users.
In this guide, you'll learn how to set up DFP. By the end, you'll have:
- Added DFP to your application.
- Wired up a JS event to call GetTelemetryId().
- Called the Fingerprint Lookup endpoint.
- Collected fingerprint data to store.
- Analyzed Stytch's recommended actions.
Before you start
In order to complete this guide, you'll need the following:
- A Stytch project (either Consumer or B2B). If you don't have one already, in the Dashboard, click on your existing project name in the top left corner of the Dashboard, click Create a new project, and then select B2B Authentication or Consumer Authentication.
- The project Test environment's project_id and secret from the API keys section. You'll need to pass these values into the Authorization request header for most Stytch API calls.
- Device Fingerprinting enabled. If you don't have the product enabled, reach out to Stytch here.
Step 1: Add the Device Fingerprinting script to your app
To bootstrap and execute Device Fingerprinting, add the following script tag into the HEAD or BODY of your app's HTML file.
<HEAD>
    <script src="https://elements.stytch.com/telemetry.js"></script>
</HEAD>
Once the HTML page is live in your app, every client that loads the page will also fetch and execute a copy of the Stytch fingerprint bundle.
Step 2: Create a JS event handler to call GetTelemetryId()
The next step is to call GetTelemetryId() when the client triggers a particular event or accesses a protected resource. For this guide, we'll wire up an onclick() event handler.
Call the async function GetTelemetryID() in the event handler with your project's public_token. This function will promise resolve to a telemetry ID for a given request.
Once you've extracted the telemetry ID, pass it along with a request to your backend or middleware as an X-header or a URL parameter.
An example of what this might look like:
<html>
<HEAD>
    <script src="https://elements.stytch.com/telemetry.js"></script>
</HEAD>
<body>
    <button id="login" onclick="login()">Click here to log in!</button>

    <script>
        function login() {
            var public_token = "{PUBLIC_TOKEN}"; // public token from Stytch Dashboard
            GetTelemetryID(public_token).then((telemetry_id) => {
                var request = new XMLHttpRequest();
                request.open('POST', 'https://www.customer.com/login', true);
                request.setRequestHeader('X-Telemetry-ID', telemetry_id);
                request.send(null);
            });
        }
    </script>
</body>
</html>
Step 3: Call Fingerprint Lookup for recommended actions
The next step is to extract the telemetry_id from your backend, middleware, or wherever you sent the request from step 2.
To pull the data and analyze the fingerprints, call our Fingerprint Lookup endpoint and pass in the telemetry_id.
curl --request GET \
  --url 'https://telemetry.stytch.com/v1/fingerprint/lookup?telemetry_id={TELEMETRY_ID}' \
  -u '{PROJECT_ID}:{SECRET}'
Note: this API call requires a basic auth header of project_id and secret, which can be found in your project's API Keys in the Dashboard.
After a successful lookup call, the response should look like this:
{
	"created_at": "2023-01-01T00:00:00Z",
	"expires_at": "2033-01-01T00:00:00Z",
	"fingerprints": {
		"browser_fingerprint": "browser-fingerprint-0b535ab5-ecff-4bc9-b845-48bf90098945",
		"browser_id": "browser-id-99cffb93-6378-48a5-aa90-d680232a7979",
		"hardware_fingerprint": "hardware-fingerprint-4af7a05d-cf77-4ff7-834f-0622452bb092",
		"network_fingerprint": "network-fingerprint-b5060259-40e6-3f29-8215-45ae2da3caa1",
		"visitor_fingerprint": "visitor-fingerprint-6ecf5792-1157-41ad-9ad6-052d31160cee",
		"visitor_id": "visitor-6139cbcc-4dda-4b1f-b1c0-13c08ec64d72"
	},
	"status_code": 200,
	"telemetry_id": "026ac93b-8cdf-4fcb-bfa6-36a31cfecac1",
	"verdict": {
		"action": "ALLOW",
		"detected_device_type": "...",
		"is_authentic_device": false,
		"reasons": [...]
	}
}
You can store and log this response to collect your fingerprint data.
Step 4: Use our recommendation actions for decisioning
In the response, in addition to the fingerprints, there is a verdict object with a recommended action for you to take against the client. There are three possible results.
- ALLOW: This is a known valid device grouping or device profile that is part of the default ALLOW listed set of known devices by Stytch. This grouping is made up of mostly verified device profiles that match the fingerprint characteristics of known or authentic origins.
- BLOCK: This is a known bad or malicious device profile that is undesirable and should be blocked from completing the privileged action in question.
- CHALLENGE: This is an unknown or potentially malicious device that should be put through increased friction such as multi-factor authentication or other forms of extended user verification before allowing the privileged action to proceed.
Our recommended actions are based on proprietary fingerprinting and device classification processes.
Step 5: View the results in the Dashboard
You can see the results of your lookups on the Device Fingerprinting Dashboard page.
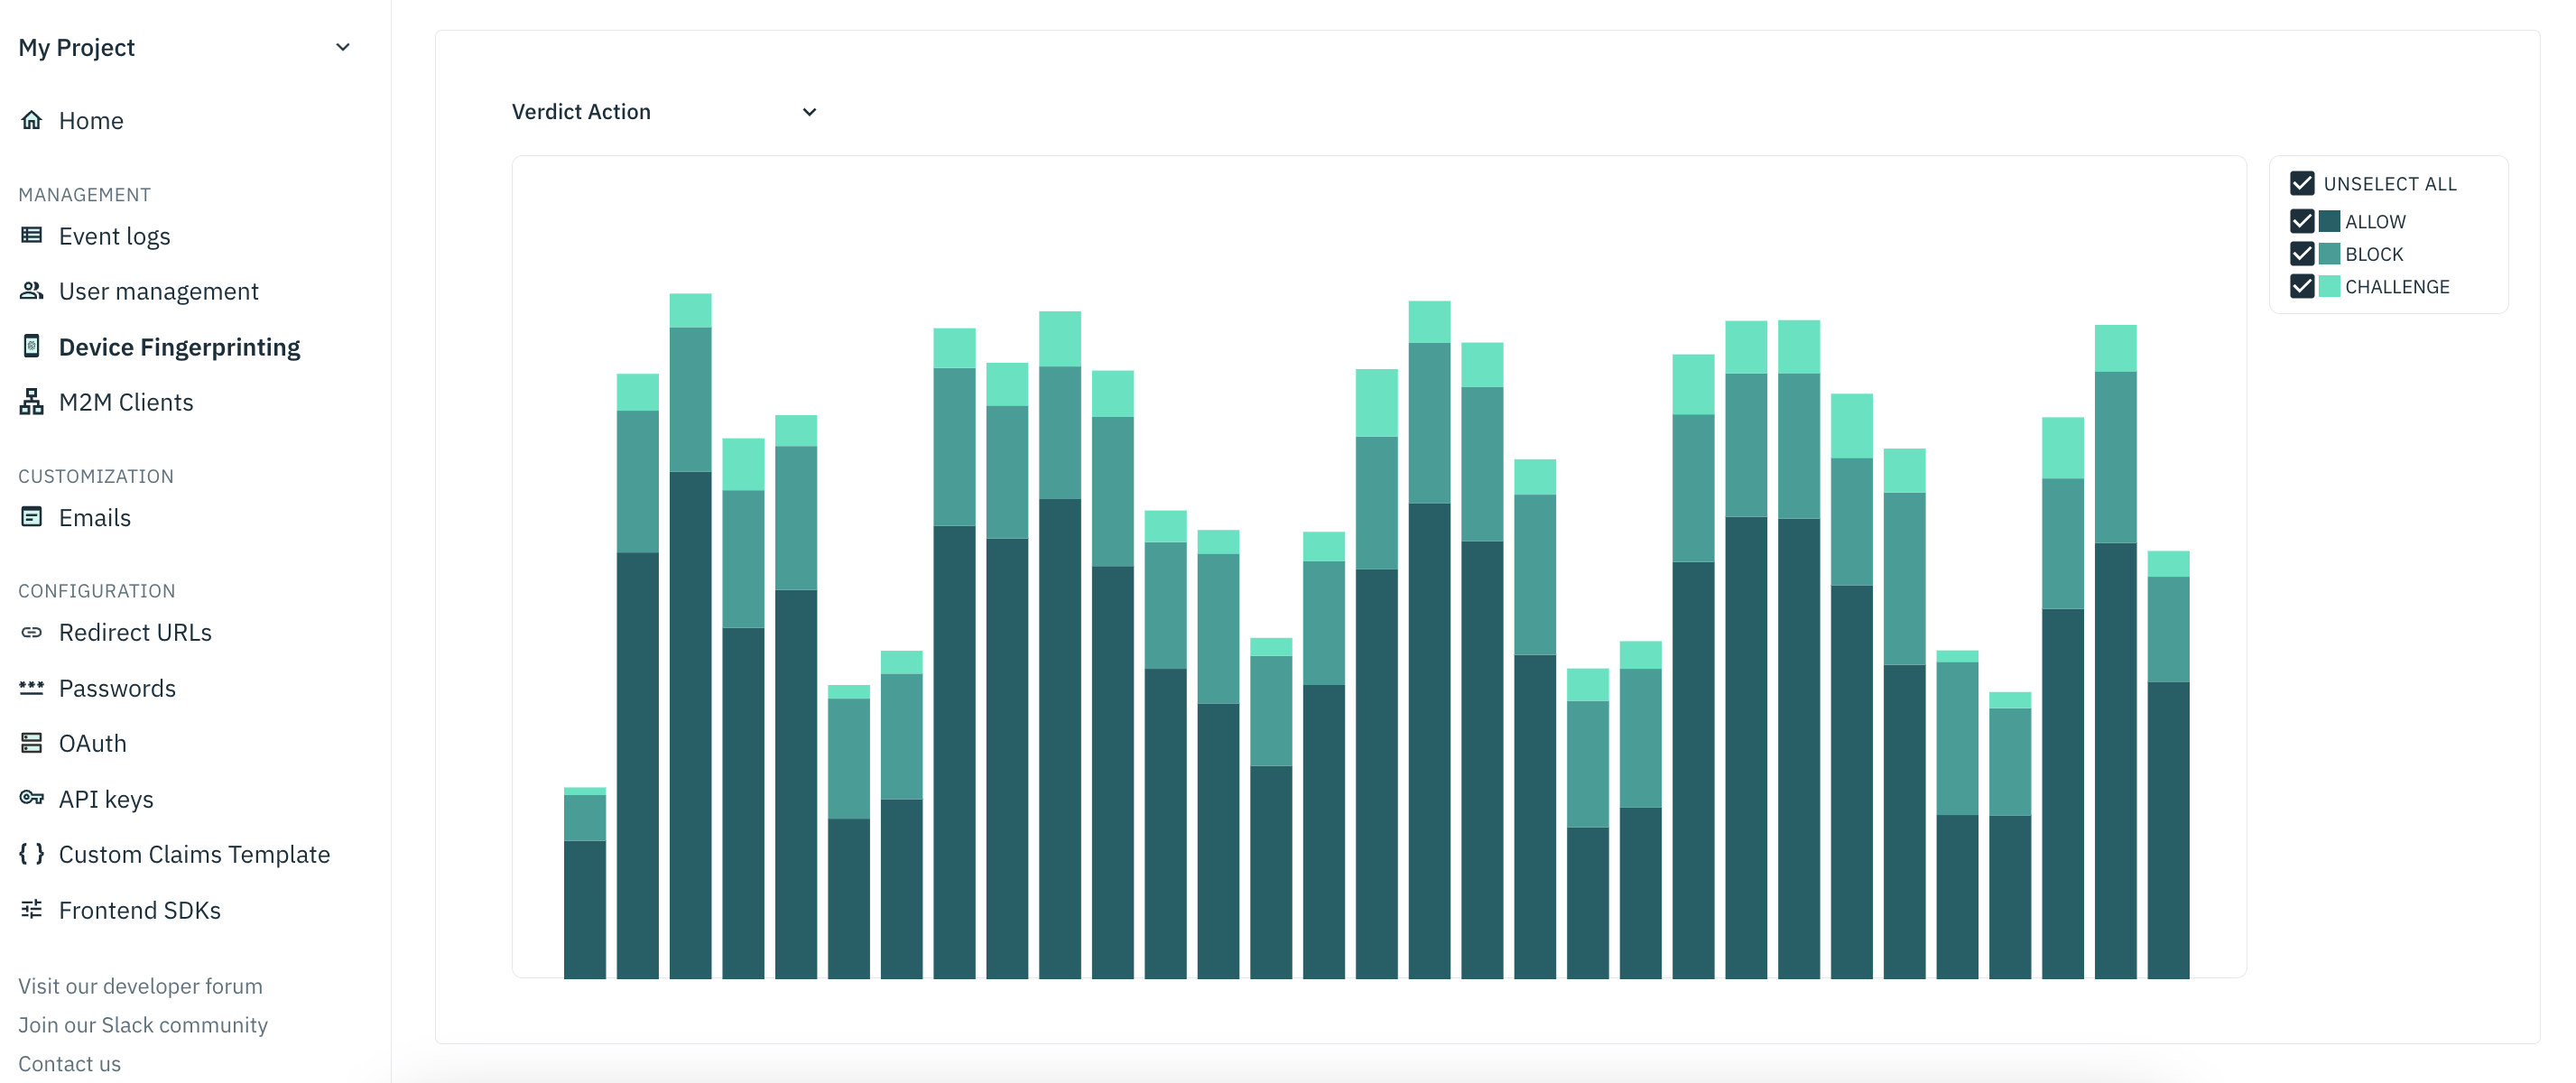
The Device Fingerprinting Dashboard page will give you a high-level view of the various fingerprints, verdicts, and verdict reasons your application is experiencing. You can also deep dive into individual fingerprints to understand the various devices that are querying your service.
What's next
Learn how to set authorization rules for specific fingerprints.
To enable Device Fingerprinting for your project, please reach out to Stytch.
Contact sales